

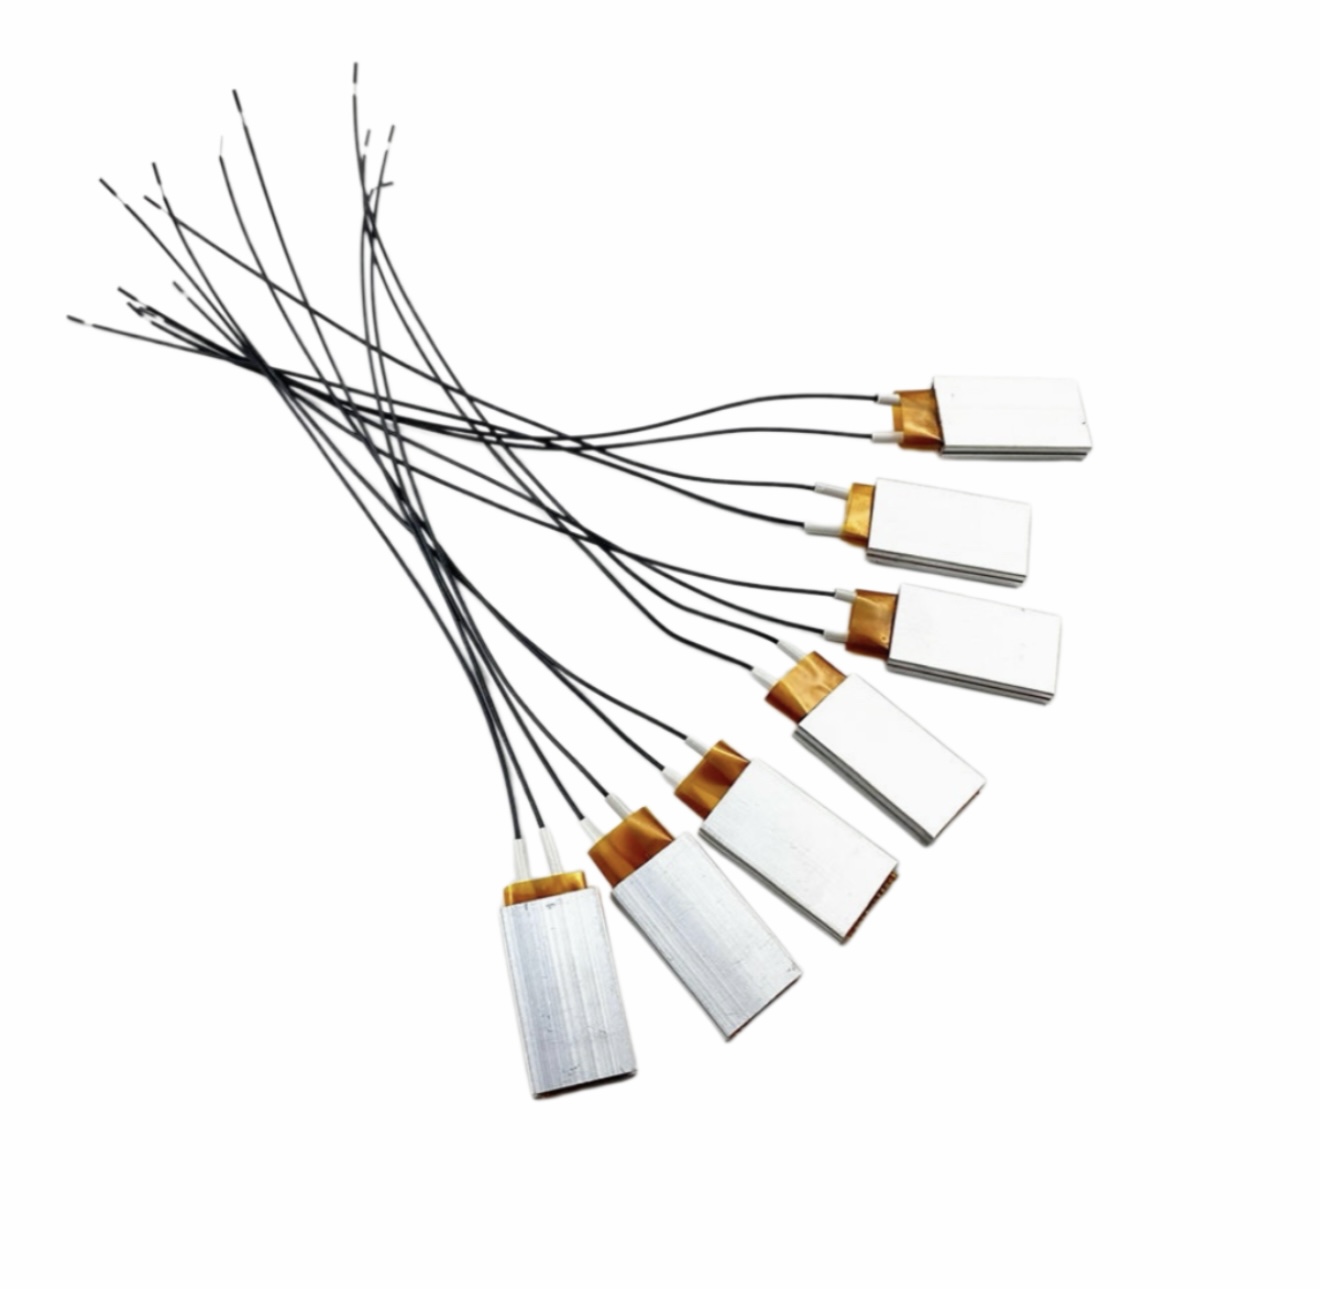
Self-Regulating PTC Heater with Aluminum Shell
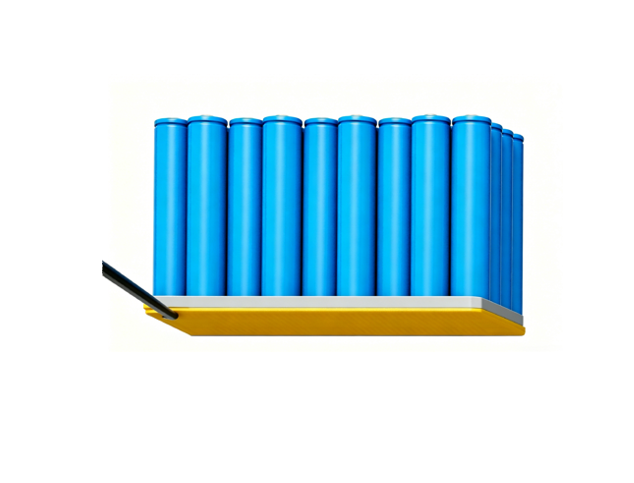
The Benefits of Using a PI Heater and Aluminum Plate for Battery Pack Heating
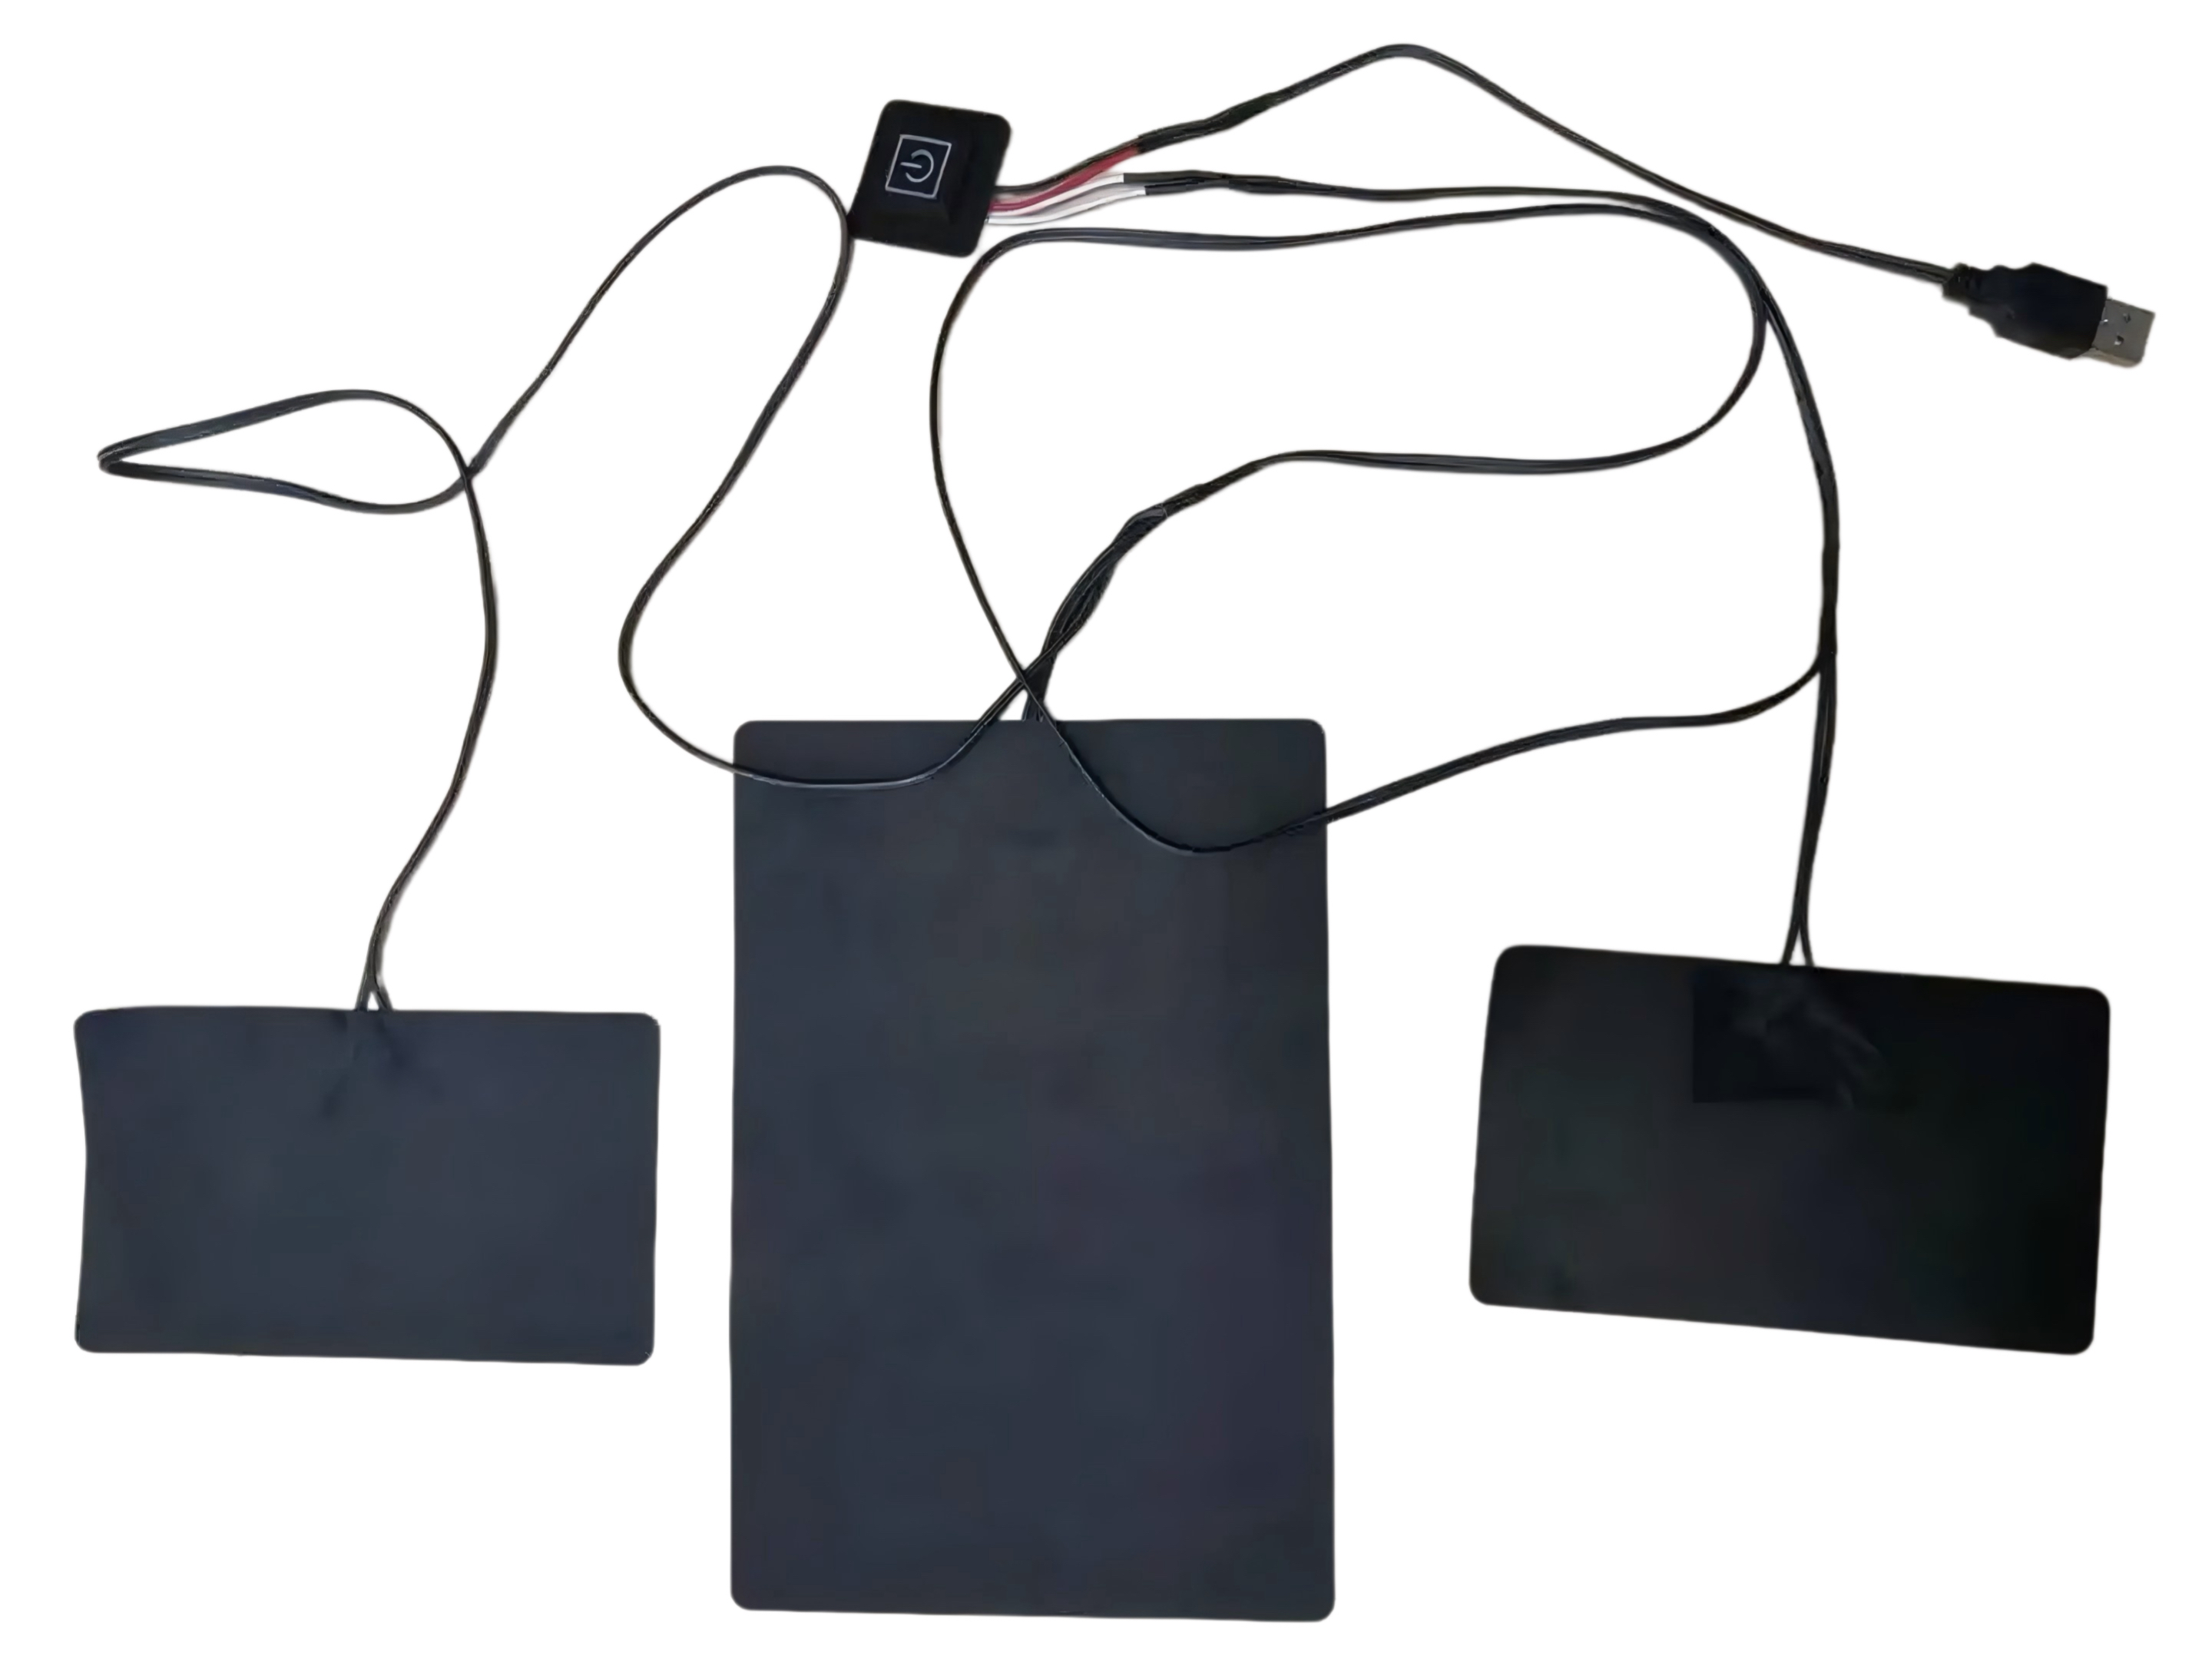
Flexible Washable Graphene Heater for Smart Heating Applications
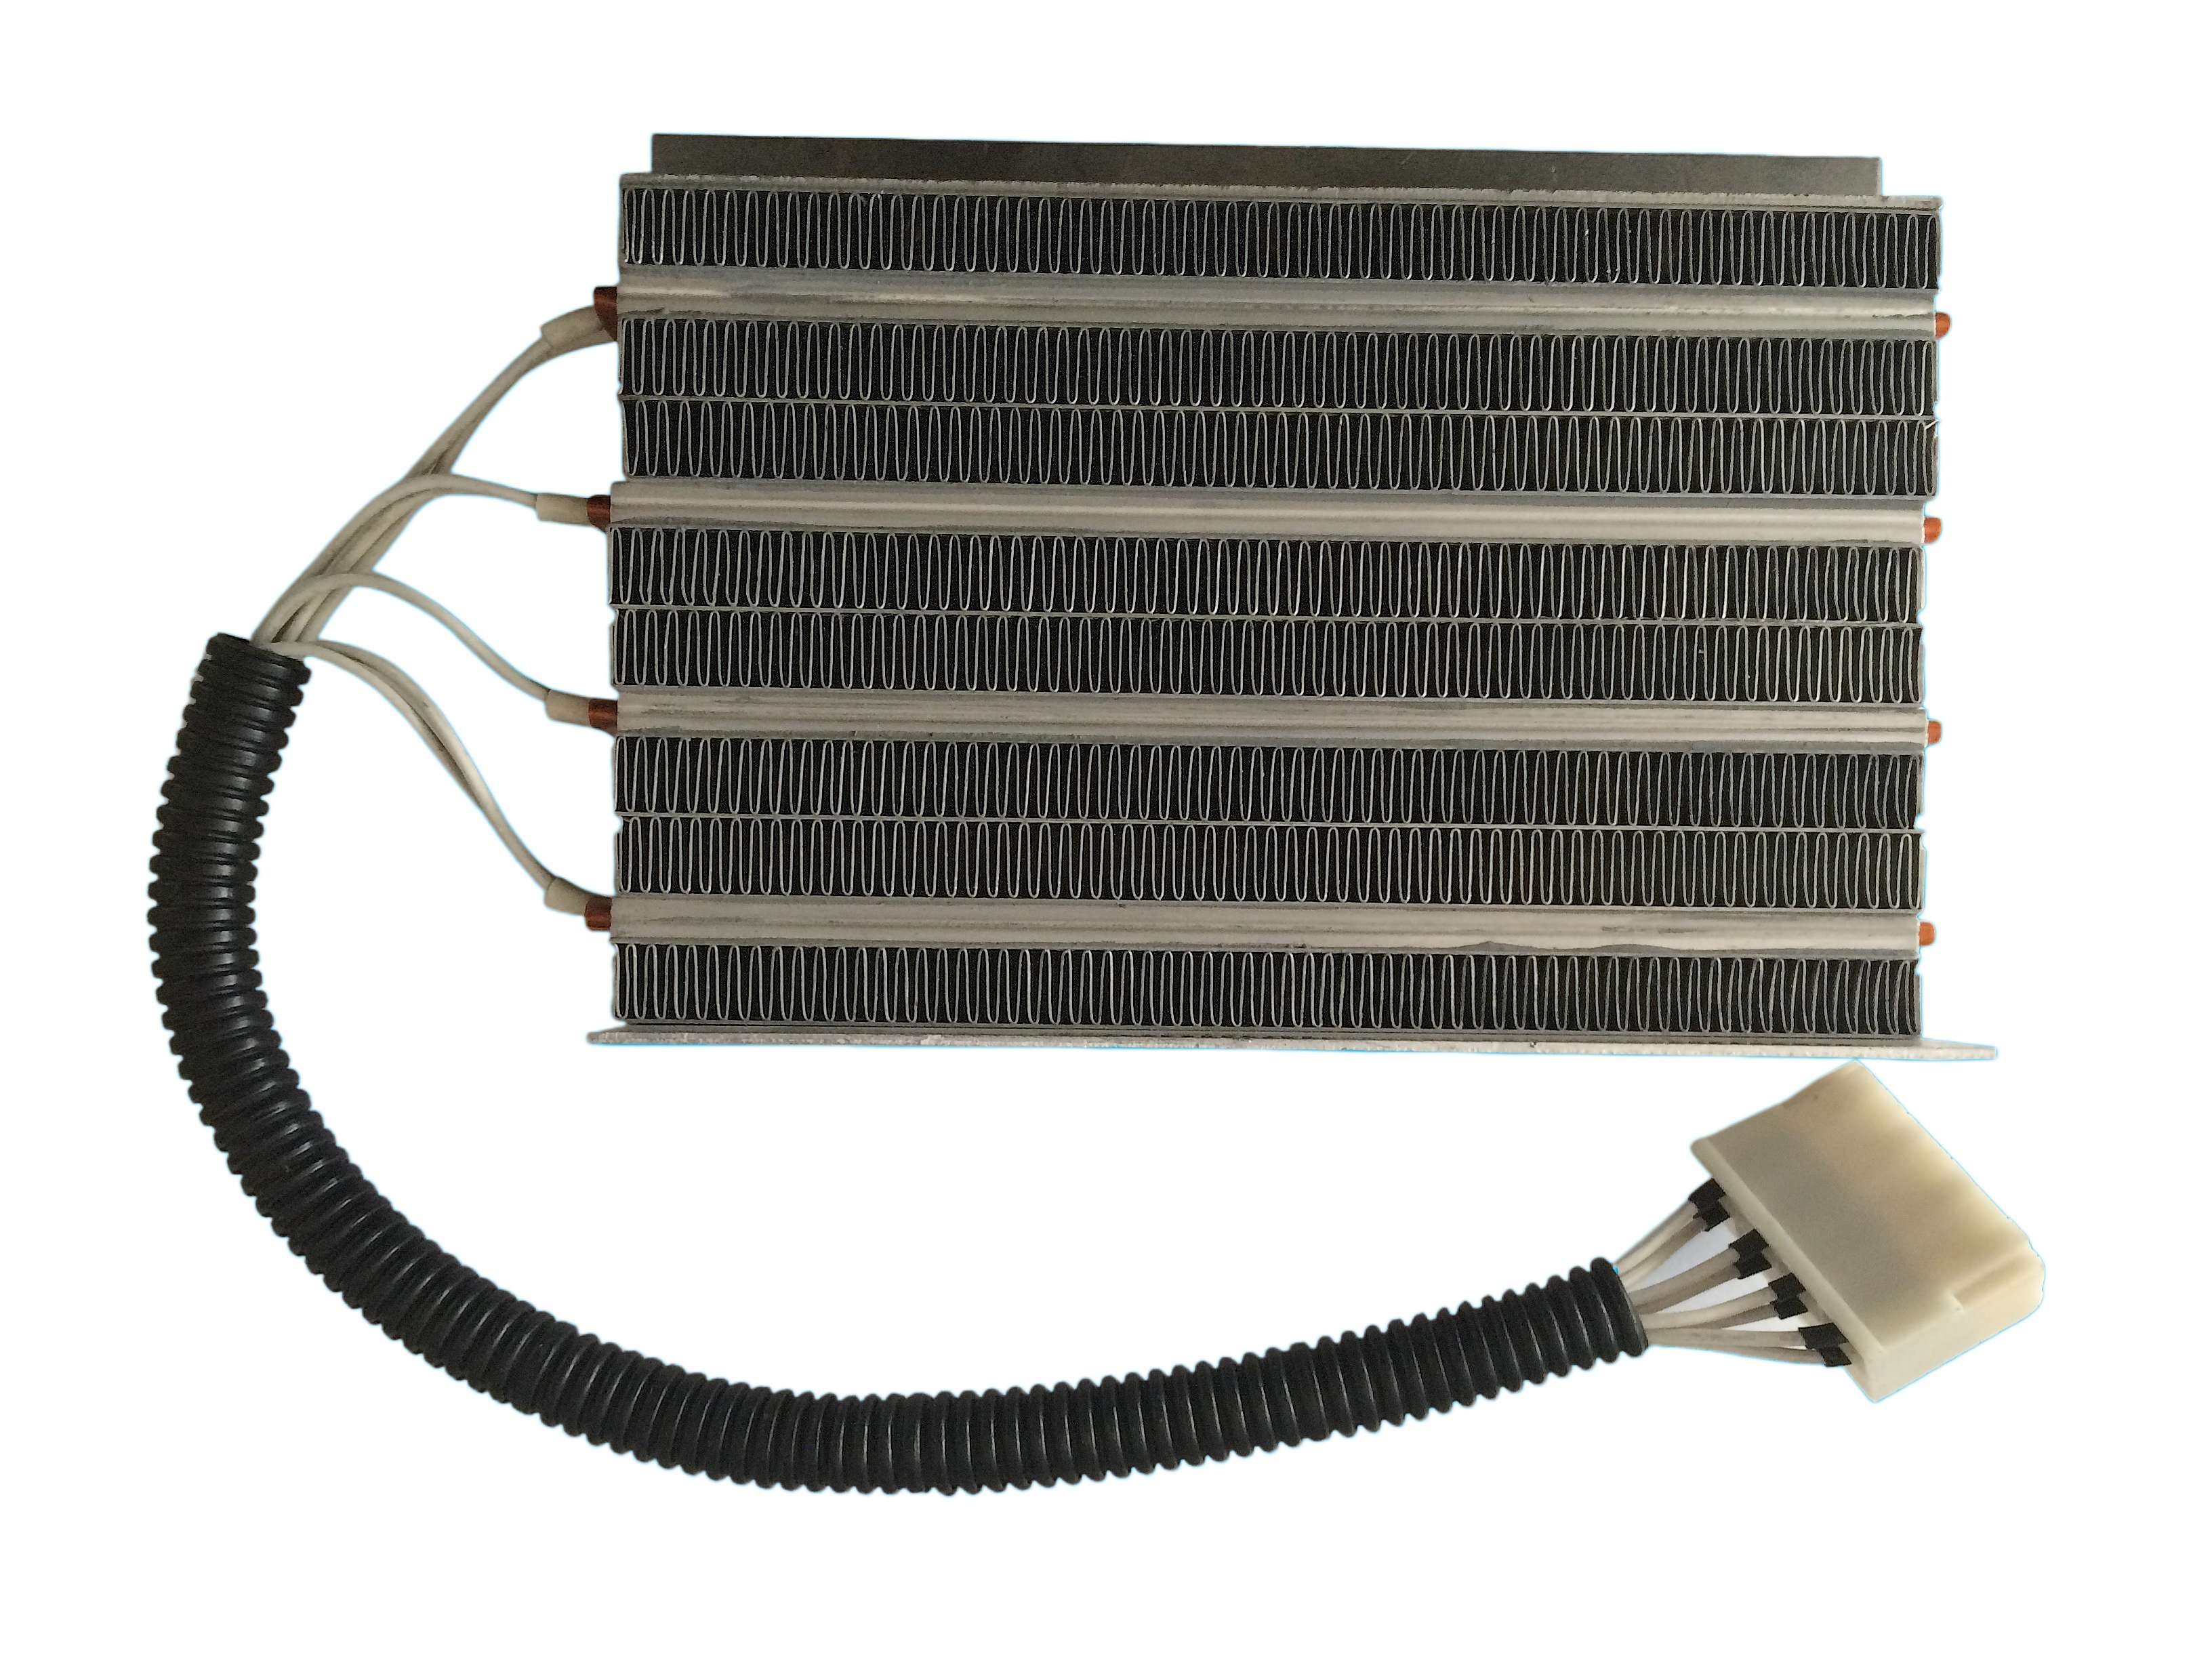
Why PTC Heaters Are Becoming a Smarter Choice for Battery Heating Applications
Factory Vulcanized Flexible Heaters for Industrial Heating
Foggy or frosted rearview mirrors can be a major safety hazard, especially in rainy or winter conditions. Installing a heater on your automobile's rearview mirror is a practical DIY solution to keep your view clear. In this guide, we will walk you through the process step by step, with detailed instructions and visual aids.
Why Install a Rearview Mirror Heater?
Before diving into the installation, let's understand why this upgrade matters:
Safety First: Clear rearview mirrors are essential for lane changes, reversing, and overall situational awareness.
Convenience: No more wiping mirrors repeatedly in fog or frost—let the heater do the work.
Cost-Effective: Aftermarket mirror heaters are affordable, and the installation is simple enough for most DIY enthusiasts.
Tools and Materials You'll Need
Rearview mirror heater (ensure it's compatible with your vehicle model)
Hair dryer
Plastic pry tool or flathead screwdriver (wrapped in tape to avoid scratches)
Strong adhesive (if not included with the heater)
Wire strippers and electrical tape
Multimeter (optional, for testing connections)
Step-by-Step Installation Process
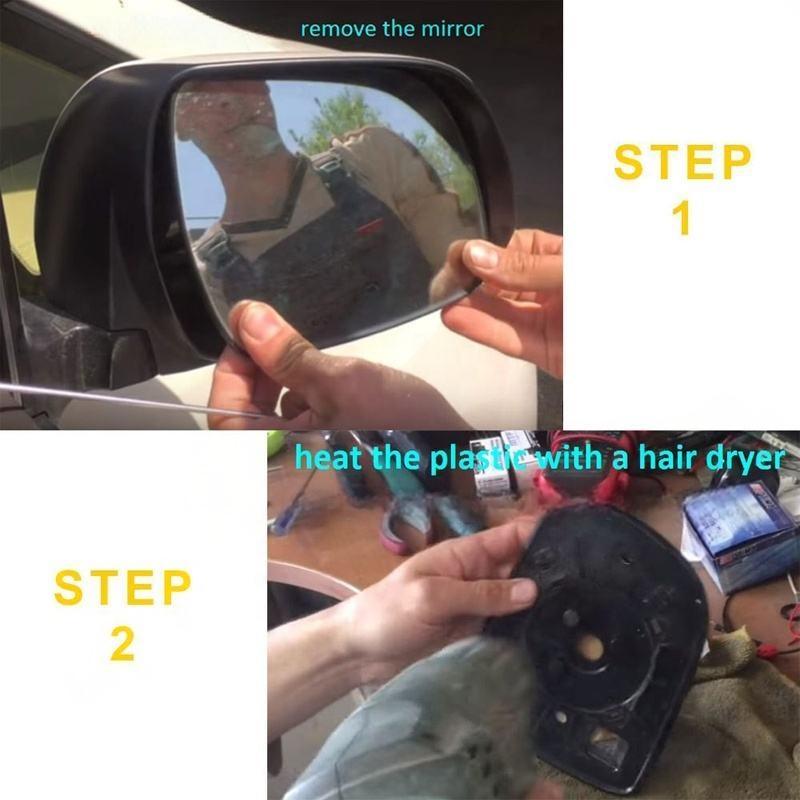
Step 1: Remove the Mirror
Start by carefully removing the existing rearview mirror from your vehicle.
● Gently pull the mirror away from the plastic frame. Use a plastic pry tool or your hands (if it comes off easily).
● Pro Tip: If the mirror feels stuck, wiggle it side to side while pulling to release the clips.
Step 2: Heat the Plastic to Separate Components
To fully separate the mirror from its plastic frame, use a hair dryer to soften the adhesive.
● Set the hair dryer to medium heat and aim it at the back of the plastic frame where the mirror is attached.
● Move the hair dryer in circular motions for 2-3 minutes to ensure even heating.
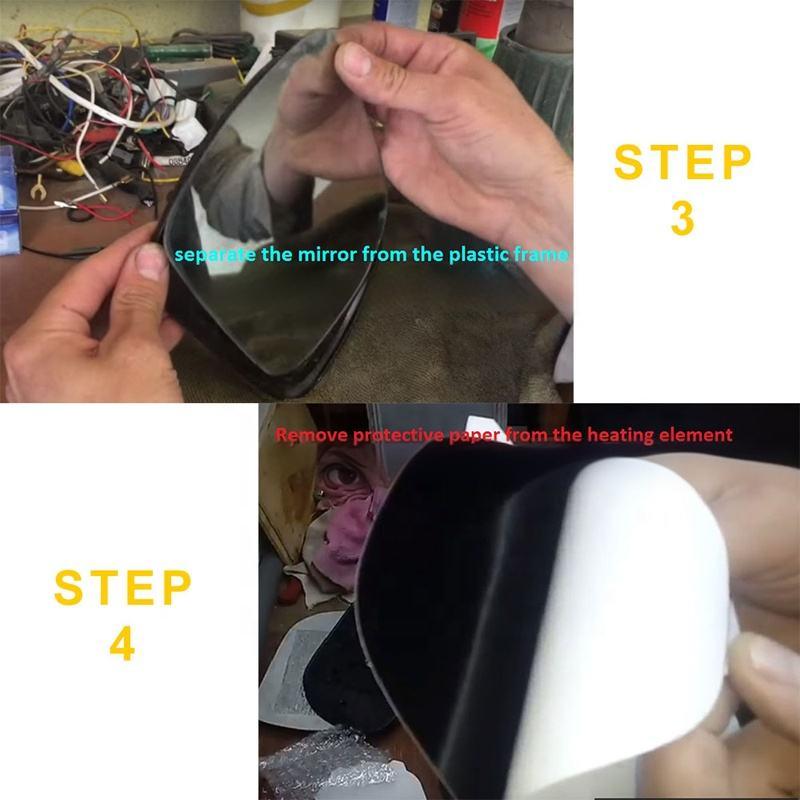
Step 3: Separate the Mirror from the Plastic Frame
Once the plastic is softened, carefully separate the mirror from the frame.
● Use a plastic pry tool to gently lift the mirror edge. Work your way around the mirror until it detaches completely.
● Handle the mirror with care to avoid cracks or scratches.
Step 4: Prepare the Heating Element
Now it's time to get the heater ready for installation.
● Remove the protective paper from the adhesive side of the heating element. Ensure the entire surface is free of debris.
● Note: Some heater kits come with pre-applied adhesive; if not, apply a thin layer of strong adhesive to the back of the heater.
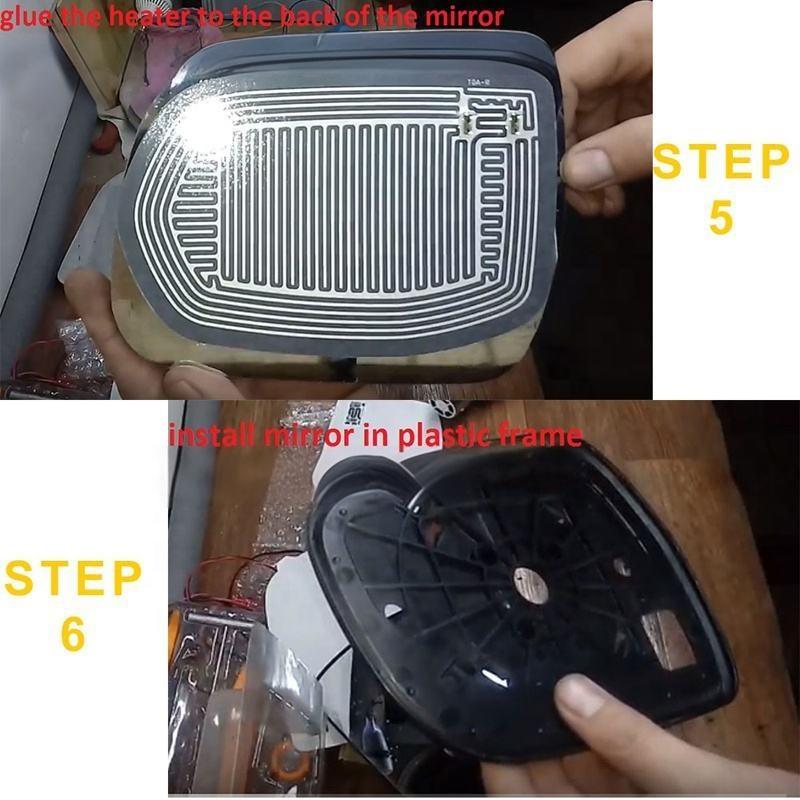
Step 5: Glue the Heater to the Back of the Mirror
Position the heater correctly and attach it to the mirror.
● Align the heating element with the back of the mirror, ensuring it covers the area evenly (this ensures uniform heating).
● Press firmly on the heater to secure the adhesive bond. Let it set for 5–10 minutes.
Step 6: Install the Mirror in the Plastic Frame
Reassemble the mirror and frame, then reinstall it on your vehicle.
● Place the mirror (with the attached heater) back into the plastic frame. Press around the edges to ensure a snug fit.
● Reattach the mirror to the vehicle’s mirror assembly. Test the fit to make sure it's secure.
Step 7: Wire the Heater (Optional)
If your heater kit requires wiring (some connect to the vehicle's electrical system for power):
● Locate a power source (e.g., the mirror adjustment motor wiring or a dedicated fuse).
● Use wire strippers to connect the heater's wires to the power source, then insulate with electrical tape.
● Pro Tip: Use a multimeter to test the connection and ensure the heater powers on.
Final Checks and Maintenance
Once installed, test the heater by turning it on and waiting a few minutes. The mirror should defog or defrost quickly. Clean the mirror regularly, but avoid using abrasive cleaners that could damage the heater or mirror surface.
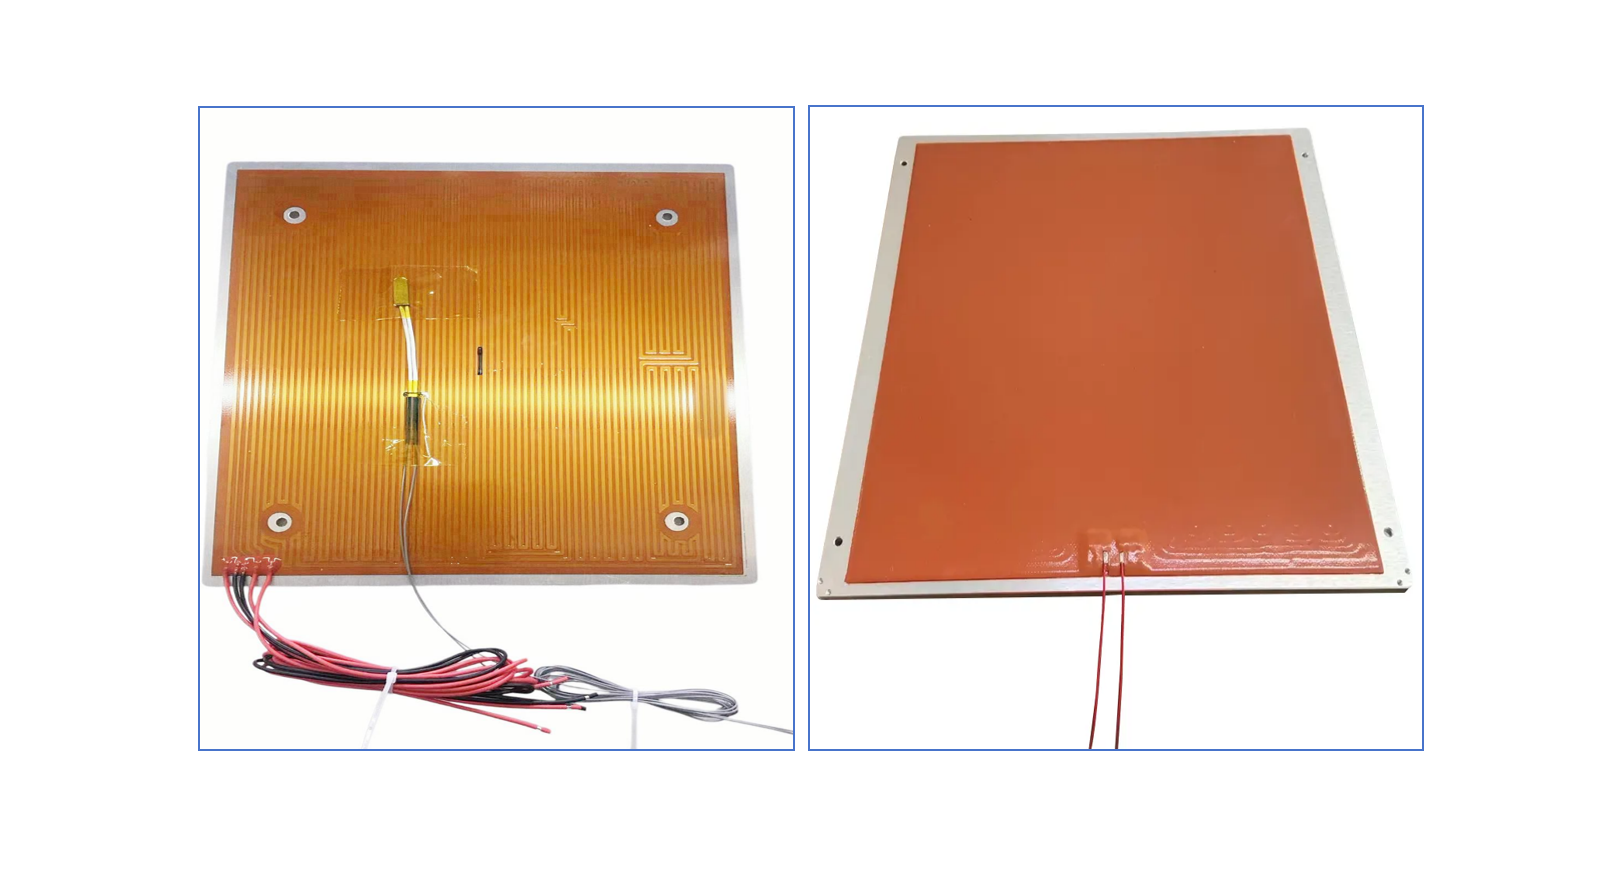
With this guide, you've successfully installed a heater on your automobile's rearview mirror. For the heater, you can choose between a PET heater or a Polyimide heater. Enjoy clear visibility in any weather, and drive safely.
We offer a wide variety of high-efficiency heaters and heating element.Such as polyimide/kapton heaters,silicone rubber heaters,PET transparent heaters, thick film heaters,PTC heaters, mica heaters,epoxy resin heaters and graphene heating film.